
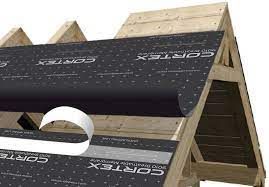
CORTEX 9010 Breathable Membrane
- Free Quotes
- Providing Quality Products in the Industry for over 40 years
- Quality Products
Enquire Now
CORTEX 9010 Breathable Membrane
Step 1.
Apply a strip of CORTEX™ Double-Sided Tape along the eaves line. Do not remove the release liner from the
double-sided tape yet.
Step 2.
Install the CORTEX™ 9010 Breathable Membrane down any roof valleys. Tack the membrane in place, and fold
back along the eaves line and remove the release liner from the double-sided tape. Bond the membrane onto the
double-sided tape.
Step 3.
Starting along the eaves line with the membrane lapping over the verge, install the membrane along the roof and extend over any valleys and onto the adjacent pitch. Tack the membrane in place as you go. The overlap in the verge will be covered by the soffit and fascia detail.
Step 4.
Fold the membrane back along the eaves line and remove the release liner from the double-sided tape. Bond the
membrane down onto the double-sided tape.
Step 5.
Repeat steps 3-4 for any adjacent pitches on the same side of the ridge.
Step 6.
Apply another strip of double-sided tape above the 100mm overlap zone at the top of the membrane. Do not
remove the release liner at this stage.
Step 7.
Install the next piece of membrane with the bottom edge lining up with the 100mm overlap line and overlapping the verge. Install the membrane over any valleys and onto
the adjacent pitch. Tack the membrane in place.
Step 8.
Fold back the bottom edge and remove the liner from the double-sided tape. Bond the membrane onto the doublesided tape.
Step 9.
Repeat this step until you reach the ridge line on all areas of the roof.
Step 10.
Follow steps 1-9 on the reverse side of the roof.
Step 11.
Where ventilation is required, an appropriate gap should be left at the ridge according to the design, but where there is no ventilation required, the membrane should lap over the ridge and onto the membrane on each pitch. The membrane shall be secured with double-sided tape at each edge and with staples.
Step 12.
Where an airtight seal is required the membranes which overlap the verges shall be bonded to the wall breather
membrane or onto the boarding/substrate. Double-sided
tape shall be used to bond and seal the membrane.
Step 13.
Attention should be paid to where the membrane meets chimneys or walls extending past or through the roof.
These areas are particularly prone to leaking if not fixed correctly. The membrane should lap 100-150mm
vertically up any upstands such as walls or chimneys.
Step 14.
Double-sided tape shall be applied to the substrate, and the membrane shall be bonded firmly in place. Additional
flashings should be applied over such areas to ensure water tightness.
Step 15.
CORTEX™ Sealing Tape and CORTEX™ Sealing Patches shall be applied over all joints and overlaps, and over staples/fixings.
Step 16.
Ensure all fixing penetrations are covered with a CORTEX™ Sealing Patch.


